Chapter 2: Supplier Ticket Management
2.0 Supplier Ticket Management
This feature is available only for buyers to create a ticket against the suppliers to manage the supplier related issues as listed below:
-
Lack of Visibility and Accountability: Ticket management is not only used to create issues or incidents, but also monitoring items, and stand-alone action plans. Ticket management system is a tool used for logging, tracking, and managing various types of tickets or requests, and including those related to issues, risks, incidents, and action plans.
Without a dedicated ticket management tool, the buyer faces difficulties in tracking and managing issues or incidents related to suppliers. This results in a lack of visibility into the status of raised tickets, responsibilities, and progress. As a result, there is a lack of accountability among team members, and issues may get overlooked or delayed, leading to potential disruptions in the supply chain.
-
Inefficient and Time-Consuming Processes: The absence of a streamlined ticket management tool for raising and not only managing supplier-related issues leads to ad-hoc and inconsistent processes but also standalone action plan and monitoring items. The ticket management system is a tool used for logging, tracking, and managing various types of tickets or requests, including those related to issues, risks, incidents, and action plans. Buyers may resort to using different communication channels such as emails, spreadsheets, or phone calls, resulting in scattered and unorganized information. This leads to inefficiencies and delays in issue resolution, wasting valuable time and effort.
-
Ineffective Supplier Performance Tracking: Without a dedicated ticket management tool, it becomes challenging to track and analyze the performance of suppliers over time accurately. There may be a lack of standardization in capturing and documenting issues, making it difficult to analyze trends, identify recurring issues, and take corrective actions. This may result in subpar supplier performance and impact the buyer's overall procurement process.
-
Supplier Performance
-
Pricing related measurements
-
Product related issues
-
Other supplier business related issues
|
Note |
The Supplier Tickets can be created by and assigned to Buyers only. |

2.0.0 Creating a New Supplier Ticket – (Manual Creation)
The buyer can create a new supplier ticket using either of the following options:
-
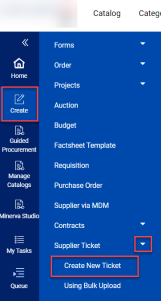
Click Create icon on the left panel à Supplier Ticket à Create New Ticket
-
Click More à Supplier Ticket Management à Create New Ticket
-
Click Create icon on the left panel à Supplier Ticket à Using Bulk Upload
-
Supplier Ticker Management Workbench àBulk Upload
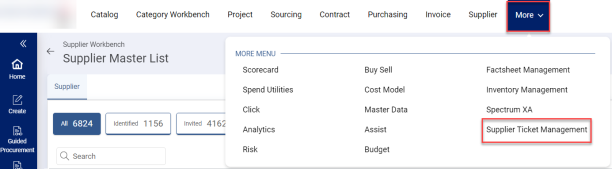
Once you click Supplier Ticket Management option, you are redirected to view Supplier Ticket Management Workbench which displays all the Supplier Tickets in various status.

Click on each tab to view the tickets which are in different status as mentioned: In Progress, Draft, Closed-Flipped To Actual, Closed, Completed, Under Review, Escalated, and Reopened-In Progress.
-
Draft Status: The ticket which is created for the first time as a draft.
-
In Progress Status: The ticket which is created and assigned to another buyer user for a validation.
-
Under Review Status: The Potential ticket which is in review with the assignee/manager.
-
Completed Status: The ticket which has completed all the actions against the milestones.
-
Closed Status: The ticket which is not related to assignee and there are no further actions to work on the ticket.
-
Reopened-In Progress Status: The closed ticket which is reopened.
-
Escalated Status: The ticket which has been escalated to higher level assignee.
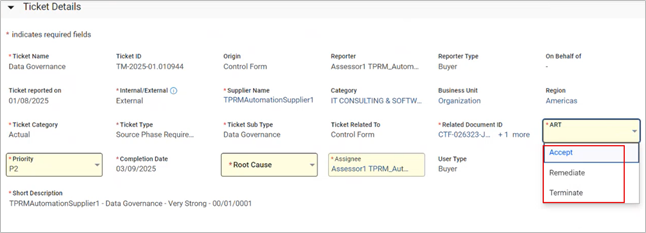
2.0.0.1 Ticket Details – (Actual Ticket Category)
-
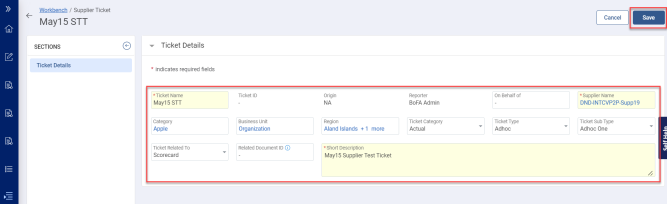
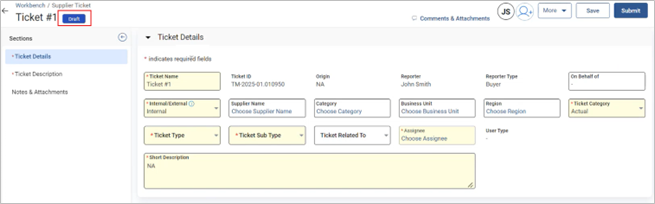
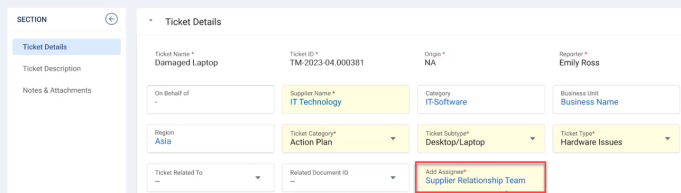
Once you click on Create New Ticket option the following screen is displayed.
|
Note |
Ensure to fill all the mandatory fields to create a new ticket. |
-
Once you select/enter all the mandatory information click the Save button, a success message appears. The ticket will be created in Draft status.
-
Once the ticket is saved and created in Draft status you can view additional fields and sections added to the ticket.
-
Ticket Name: Displays the ticket name which you have provided while creating the ticket.
-
Ticket ID: Auto-generates the ticket ID based on the new ticket creation.
-
Origin: If the ticket is created based on the supplier profile or from a scorecard, this Origin field displays with which reference the ticket is created.
-
Reporter: Displays the reporter’s name.
-
On Behalf Of: You can mention the name for whom you want to create the ticket.
-
Supplier Name: Displays the selected supplier name. Ticket can be created for a single supplier only and the list of suppliers available for selection is coming from the supplier profile.
-
Internal/External: Select the required option if the ticket is created based on internal issues (buyer team) or external issues (third-party team).
-
Category, Business Unit, Region: These fields are auto-populated when you select a supplier as defined in the supplier profile document. Ticket Category: There are two categories to be selected.
w Actual: Select the category as Actual if there are some action plans to be completed to resolve the issues that have occurred to the ticket.
w Potential: Select the category as Potential based on a few measurements and analysis of issues for which the ticket can be converted to Actual in the future.
-
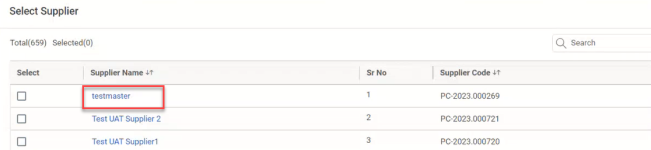
Ticket Creator can navigate to the Supplier Profile page from the Supplier Selection slider.
-
Click on the hyperlink under Supplier Name column to view Supplier profile page.
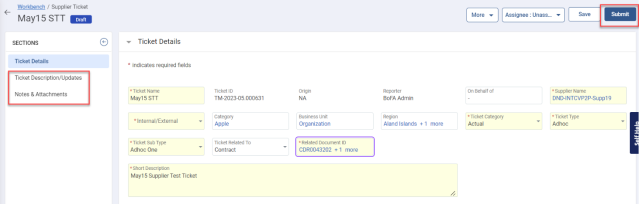
2.0.0.2 Ticket Description/Updates
In this section you can provide or update the ticket description as needed. This field is editable throughout the lifecycle of the ticket.
|
Note |
The character limit to add/update the ticket description is limited to 4000 characters. |

2.0.0.3 'View Only' Ticket Functionality
Without editing rights to the ticket document, all fields within the ticket management documents are now set to 'view only.'
2.0.0.4 Notes and Attachments
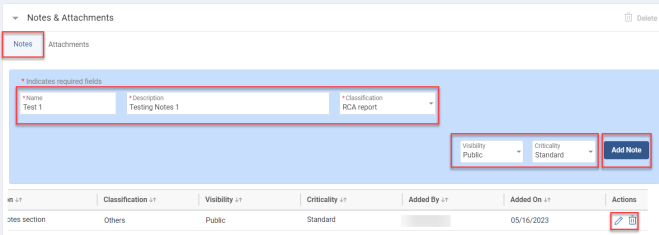
In this section you can view two tabs, Notes and Attachments.
-
Notes – You can add notes to the ticket. To add Notes, click Notes tab to enter the Name and Description, select Classification type from drop-down, select Visibility and Criticality and then click Add Note.
-
Click Edit icon to perform any modifications to existing note. Click
 icon to delete a note.
 -
Attachments - You can upload soft copies of the documents and additional documents.
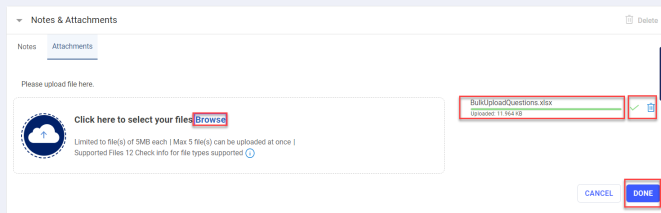
w Click Browse or you can drag and drop the required file to upload. select, and click Open to upload the document.
w On successful upload of the document, click the Done button. A success message appears.
w The uploaded attachment is displayed in the section as shown in below figure.
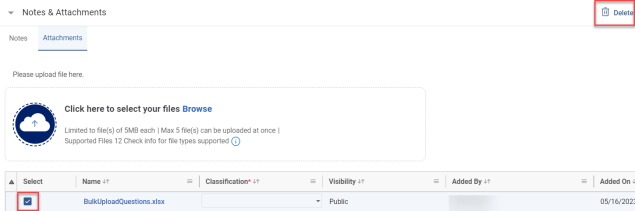
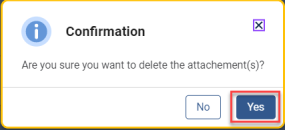
w To delete the existing attachment, select the required attachment and click the Delete icon. A confirmation message appears, click the Yes button to delete, else click the No button to discard.
-
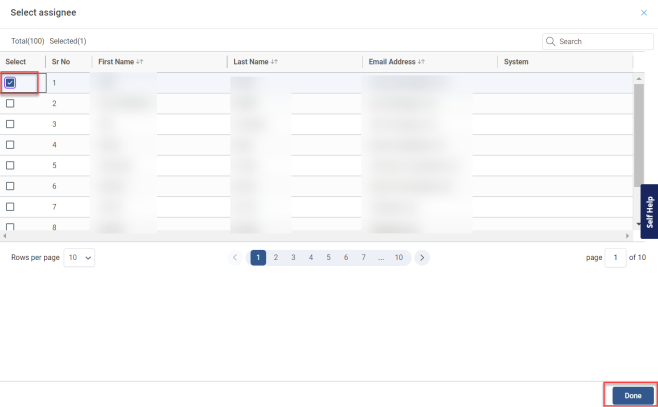
Once you entered all the details in each section, select the assignee from the list to assign the ticket and then click the Save button to save the details. A success message appears as Data saved.

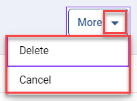
w You can delete or cancel the ticket using More options.
-
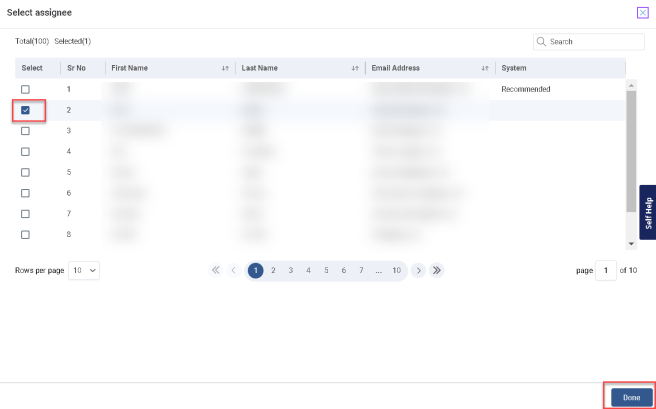
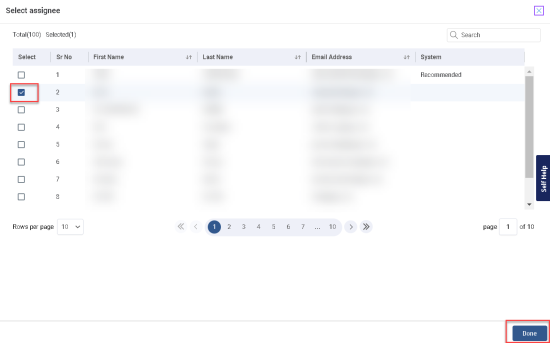
Select the assignee name from the available list and click the Done button.
|
Note |
Selecting an assignee is a mandatory field to submit the ticket. |
-
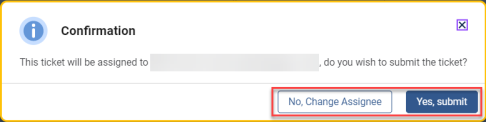
Now, click the Submit button to submit the ticket. A confirmation message appears, click Yes, submit button else click No, Change Assignee button to change the assignee of the ticket.
-
Once you click on Yes, submit button. The ticket number will be generated, and the status of the ticket will change to In Progress.
-
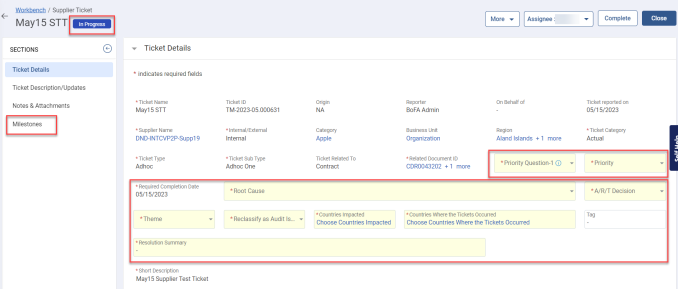
You can also view a few more additional fields added to the Ticket Details section and a new additional section Milestones is added as shown in the below figure.
-
New additional fields in Ticket Details section: In this section some of the fields are custom and standard fields.
w Standard Fields: Priority and Required Completion Date
· Priority Field: This fields represents the priority level of the ticket.
· Required Completion Date: Based on the Priority1 and Priority3 selection the required completion date is auto populated to complete the action plan to resolve the issue against the ticket.
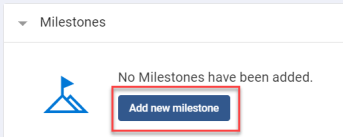
2.0.0.5 Milestones – New Additional Section
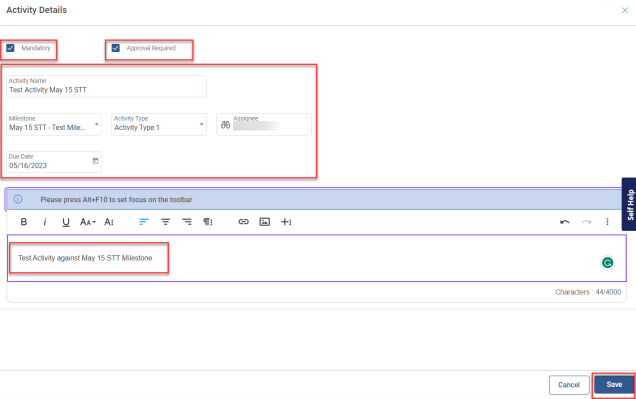
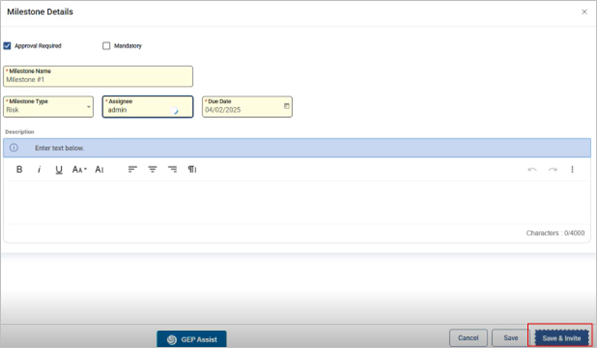
In this section, you can add milestones that are to be completed to resolve the issues of the ticket. To add a new milestone, click Add new milestone button as shown in the below figure.
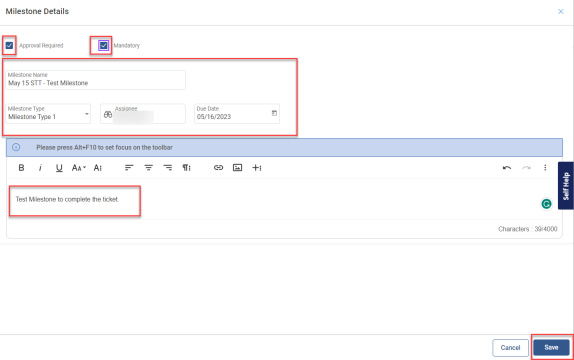
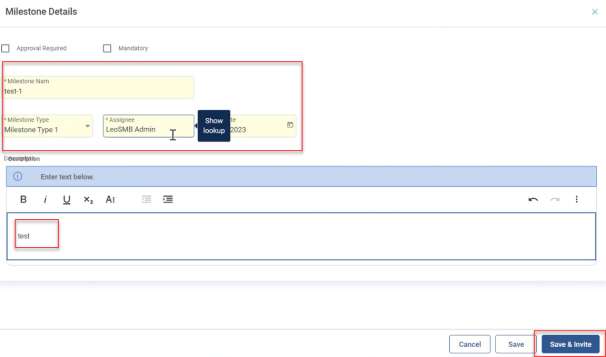
The following screen appears. Enter/select all the mandatory milestones details, description and click the Save button.
-
If the Mandatory checkbox is enabled, it represents that the milestone is mandatory to complete the ticket.
-
If the Approval Required checkbox is enabled, it represents that the approval is required from the approver to process the milestone.
-
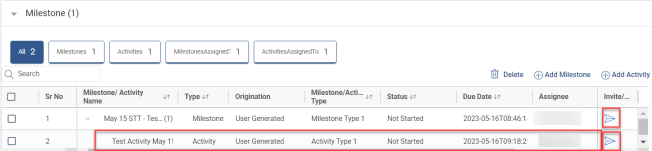
Once the milestone is added, it is displayed under the Milestone section.

-
Now, you can add the Activity against the milestone. To add a new activity click Add Activity as shown in above figure. The following slider appears. Enter/select all the mandatory fields and click the Save button.
-
The added Activity is displayed under the Milestone section.
-
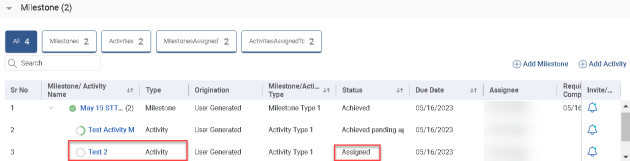
Click the Invite icon to send the invitation to the assignee which notifies them that the Milestone and Activity are assigned for his action to complete the ticket process.
|
Note |
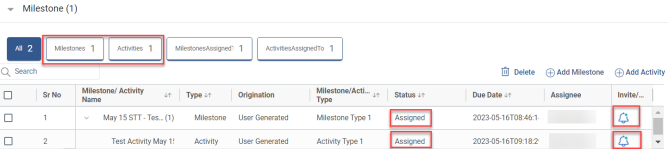
Once the milestone and activity are added, the status will be ‘Not Started’. Once the invitation is sent to the assignee, the status will change to ‘Assigned’. |
-
The assignee can click on Milestone and Activities tabs to view the actions assigned.
-
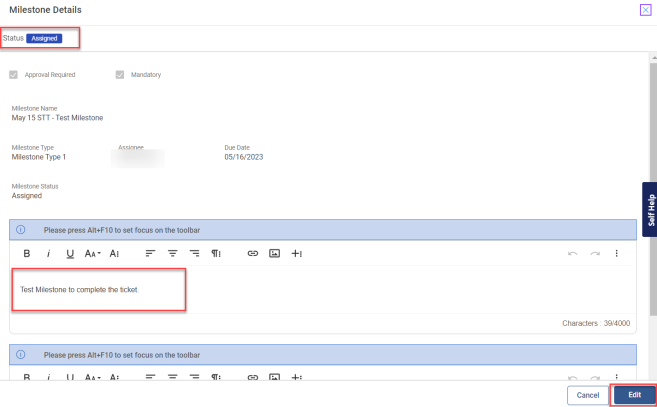
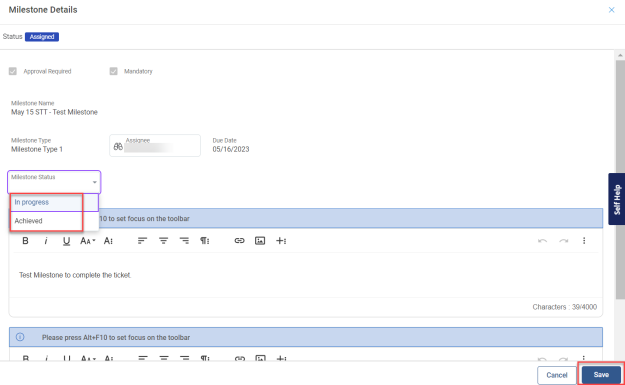
If you click the Milestones tab, the following screen appears to review/edit the milestone. To edit the Milestone, click the Edit button to change the assignee, the assignee can re-assign the milestone to other users for a review, in case the primary assignee is not available for a review or if the primary assignee is not a valid person to review.
-
You can change the Milestone status to In progress or Achieved.
w In progress – this represents that the milestone work is initiated and is in progress.
w Achieved – this represents that the milestone work is complete and marked as Achieved.
-
Click the Save button.
-
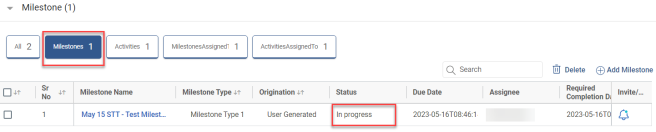
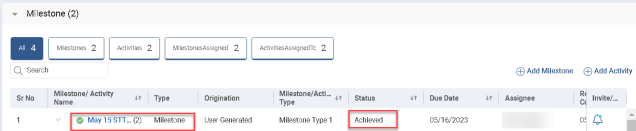
The status will change to In progress as shown in below figure.
-
Click the Activity tab, and the following screen appears to review/edit the activity details. To edit the Activity, click the Edit button to change the assignee, the assignee can re-assign the Activity to another user for a review in case the primary assignee is not available for a review or if the primary assignee is not a valid person to review.

-
You can change the Activity Status to In progress or Achieved.
w In progress – this represents that the activity work is initiated and is in progress.
w Achieved – this represents that the activity work is complete and marked as Achieved.
-
Click the Save button.
-
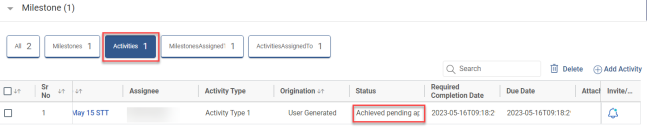
The status will change to Achieved pending approval as shown in the below figure.
-
To delete Milestones or Activities select the required milestones or activities and click the Delete icon. A confirmation pop-up message appears, click Yes to delete or No to discard.
|
Note |
You cannot delete the Milestones or Activities which are in In progress or Achieved pending approval status. You can only delete the Milestones or Activities which are in Not Started (Drafted) status. |
|
Note |
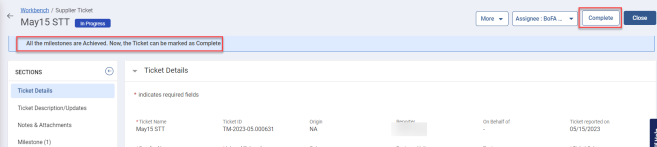
Once all the Milestones are Achieved, the ticket can be marked as Complete status. |
-
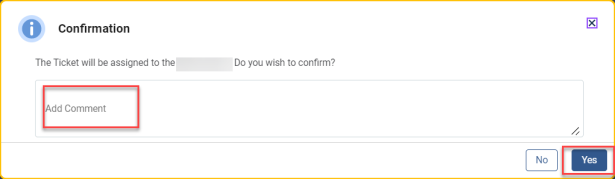
Click the Complete button, a confirmation pop-up message appears, enter your comments, and then click the Submit button.
-
Click the Close button, a confirmation pop-up message appears, click Yes to confirm else, No to discard.
-
Click More to view additional options.
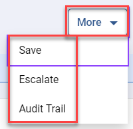
w Save – Saves the details of the ticket.
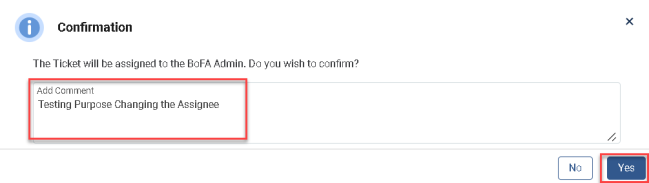
w Escalate – Allows you to change the current assignee. If you click this option, assignee slider will appear to select another assignee (of higher level) to change the current assignee. Select the desired assignee from the list and click the Done button. A confirmation pop-up message appears, enter your comments in the field and click the Yes button else, click No button to discard.
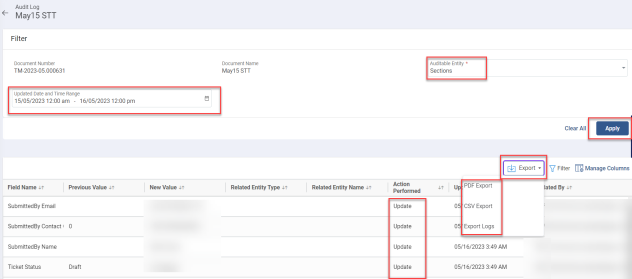
w Audit Trail – Displays the actions performed on the ticket.

w In the Audit Log page, select the Auditable Entity and Updated Date and Time Range fields and then click the Apply button. The defined details are displayed as shown in below figure.
w You can export the details in different available formats.
-
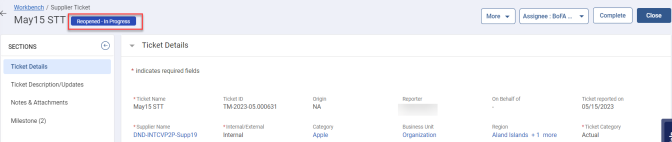
Once the ticket is in Completed status, you can reopen the ticket to perform any changes or modifications to the ticket. If you click the Re-Open button a confirmation pop-up message appears, click Yes and a success pop-up message appears.

-
If the ticket is reopened, the status will change to Reopened In-Progress status.
-
Now, the ticket will be in edit mode to change or modify required information in each section as required.
-
Once, details in all the sections of the fields are done, click the Complete and Close buttons.
-
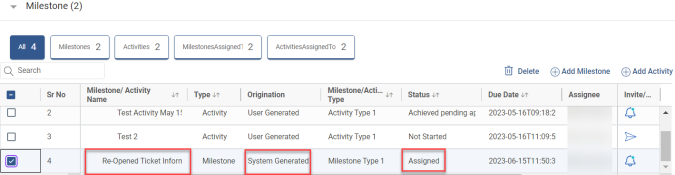
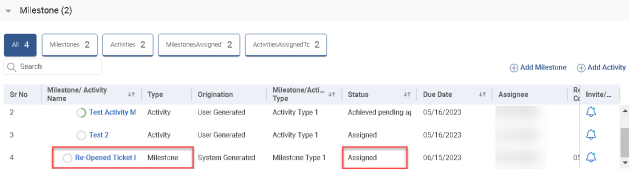
For the Reopened ticket there will be autogenerated (System Generated) Milestones and Activity will be generated and displayed in the Milestones sections as shown in the below figure.
2.0.0.6 Ticket Details – (Potential Ticket Category)
-
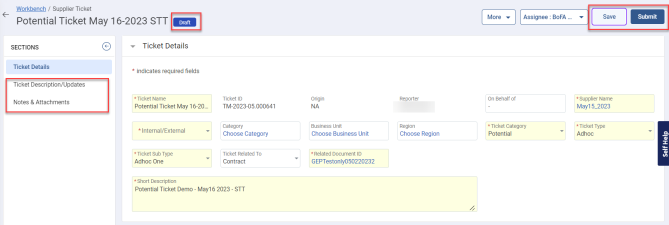
Once you click on Create New Ticket option the following screen is displayed.
|
Note |
Select Ticket Category as Potential and ensure to fill all the mandatory fields to create a new ticket. |

-
Once you select/enter all the mandatory information, click the Save button, and a success message appears. The ticket will be created in Draft status.
-
Follow the same process for filling the Ticket Description/Updates and Notes and Attachments sections which is explained in the above Actual Ticket Category process.
-
Once all the fields information is entered click the Save and Submit buttons.
-
Now, click the Submit button to submit the ticket. A confirmation message appears, click the Yes, submit button else click No, Change Assignee button to change the assignee of the ticket.
-
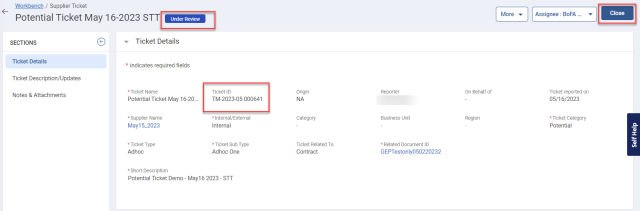
Once you click Yes, submit button. The Ticket ID will be auto generated, and the status of the ticket will change to Under Review.
-
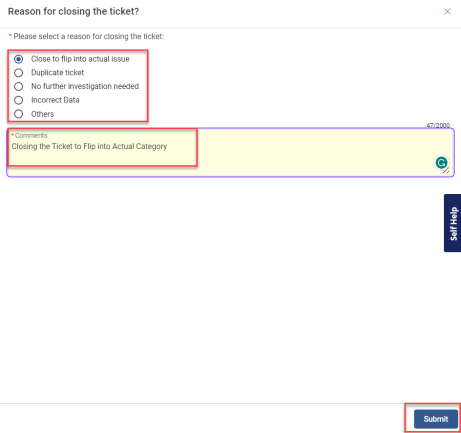
Click the Close button to close the ticket. A slider will appear to select the reason for closing the ticket, provide your comments in the field and click the Submit button. A success message appears, and the ticket status changes to Closed.
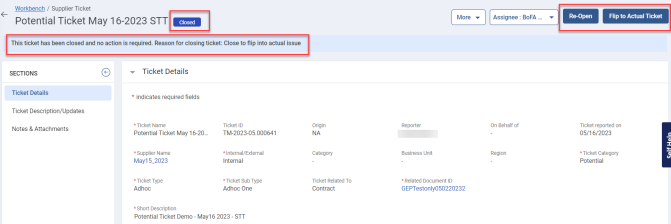
|
Note |
You can Re-Open the closed ticket or Flip to Actual Ticket. If there is no further action required, you can end the ticket in Closed status. |
-
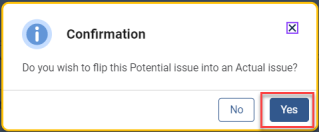
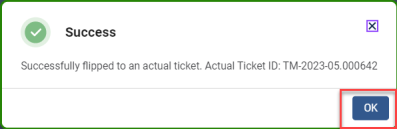
If you wish to Flip to Actual Ticket, click the Flip to Actual Ticket button, and a confirmation pop-up message will appear click Yes to Flip else, No to discard. A success message appears with an auto-generated Actual Ticket ID. Click OK.
-
You will be redirected to the ticket which is Flipped to Actual Category and the status will change to Draft.
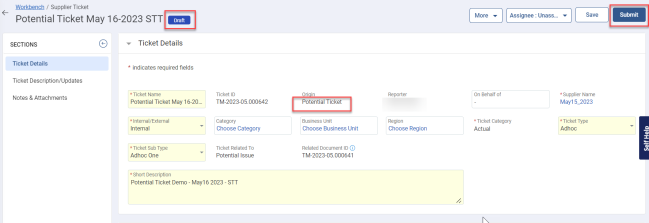
|
Note |
You can view that the ‘Origin’ of the ticket is auto generated as ‘Potential Ticket’ as it is originally Flipped from ‘Potential Ticket Category’ to ‘Actual Ticket Category’. You can also view that the ‘Ticket Related To’ and ‘Related Document ID’ fields are auto generated as Potential Issue and Potential Ticket Number.
|
-
Now, the ticket will be in editing mode where you can change or modify the existing details. You can select the Assignee from the available slider list.
-
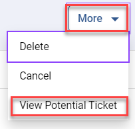
To view the original Potential ticket, click More à View Potential Ticket to navigate/open the ticket.
-
If you have opened the Potential ticket the status will be Closed-Flipped To Actual and to navigate back to the Actual ticket, click the View Actual Ticket button.

|
Note |
For adding information in the remaining sections and adding Milestones and Activities, you can follow the same process/steps explained in the above (Ticket Details – Actual Ticket Category) section.
|
2.0.1 Options to Create Tickets
There are multiple ways to create a ticket as listed below:
-
Manual Ticket Creation: Follow the process as explained in the above section 2.1.1
-
Flip from Other Documents: You can create a Ticket using the source type:
-
a) Scorecard
-
b) Supplier Risk Assessment Form
-
Using Bulk Upload: Using Template
2.0.1.1 Ticket Creation – Flip from Other Documents using – (Scorecard)
A ticket can be created using the Flip Scorecard option if in cases where the low scores are not acceptable by the buyer organization, a penalty can be assigned, which might lower the score further so that the supplier can take steps to correct it.
It will help penalize the suppliers if the performance is below the threshold so that the use cases, like outstanding performance on one parameter and extremely poor on another parameter, do not result in average performance for the scorecard for that supplier. The penalty will further reduce the score. To get a good score scale and take proper measurements, a ticket can be created by following the below steps:
-
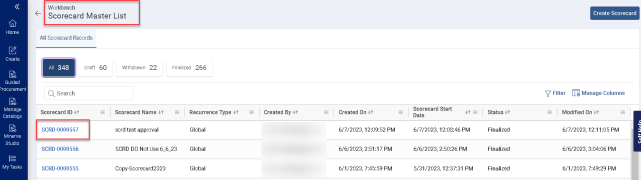
To create a ticket using Flip from the scorecard. Open the Scorecard workbench and click any Scorecard ID to open the scorecard as shown in the below figure.
-
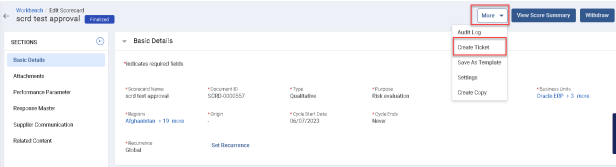
Click More to view more options and click Create Ticket as shown in the below figure.
-
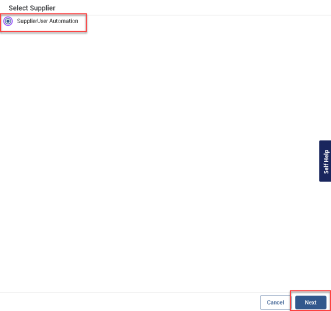
A slider will appear, select the Supplier, and click the Next button.
-
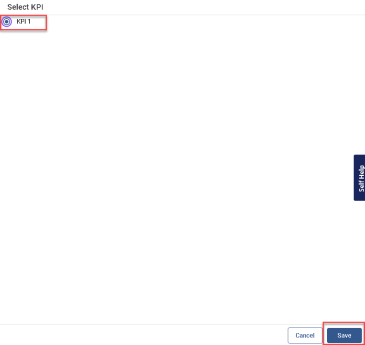
Another slider will appear, select the KPI and click the Save button.
-
You will be redirected to the Supplier Ticket Management Workbench, where a new ticket is created with some of the fields auto-filled.
|
Note |
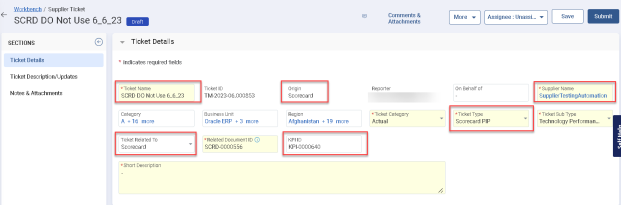
The Ticket Name will be the Scorecard ID as you flipped the ticket from Scorecard. The Origin will be Scorecard as the source of the ticket is considered from the Scorecard. |
-
a) You can notice that some of the fields are auto-filled as the ticket is flipped from Scorecard as shown in the below figure.
2.0.1.2 Access to Action Buttons
Supplier Ticket Creators & Ticket Assignees can access the Action buttons based on the document status.
Supplier as a Ticket Creator:
As Supplier Ticket Creator, you can access the following Action buttons in the Draft status:
-
Create Ticket
-
Save
-
Submit
-
Delete
-
Copy Ticket
-
Save as Template
Supplier as a Ticket Assignee:
As the Ticket Assignee, you can access the following Action buttons in the Draft and In-progress statuses:
-
Close
-
Complete
-
Re-Open
2.0.1.3 Ability to View Ticket Type and Subtype Options
As an Admin, you can configure the availability of ticket type and sub-type options per Buyer or Supplier Ticket Creators.
Example: The Supplier will be able to view only limited permitted ticket type options.
2.0.1.4 Ticket Description/Updates
In this section you can provide or update the ticket description as needed. This field is editable throughout the lifecycle of the ticket.
|
Note |
The character limit to add/update the ticket description is limited to 4000 characters. |
2.0.1.5 Ticket Status Management
The Draft status is now eliminated from the ticket creation process. when you create a new ticket, the status changes from the initial No State to In-Progress eliminating the need for the manual step of submitting the ticket in Draft status before progressing.
Setting Name: Click reduction to in-progress status as part of creating new tickets/action plans.
Introducing Single Step In-progress Ticket:
The ticket creation process is streamlined by removing the intermediate Draft status, enabling faster progression. This enhancement accelerates ticket creation for both Buyers and Suppliers, with tickets automatically transitioning to the In-Progress status, minimizing delays.
2.0.1.6 Notes and Attachments
In this section, you can view two tabs, Notes and Attachments.
-
Notes – You can add notes to the ticket. To add Notes, click Notes tab to enter the Name and Description, select Classification type from drop-down, select Visibility and Criticality and then click Add Note.
-
Click Edit icon to perform any modifications to existing note. Click
icon to delete a note. -
Attachments - You can upload soft copies of the documents and additional documents.
w Click Browse or you can drag and drop the required file to upload. select, and click Open to upload the document.
w On successful upload of the document, click the Done button. A success message appears.
w The uploaded attachment is displayed in the section as shown in below figure.
w To delete the existing attachment, select the required attachment and click the Delete icon. A confirmation message appears, click the Yes button to delete, else click the No button to discard.
-
Once you entered all the details in each section, select the assignee from the list to assign the ticket and then click the Save button to save the details. A success message appears as Data saved.
|
Note |
To complete the ticket submission, follow the same steps as explained in the above section 2.1.1.4 |
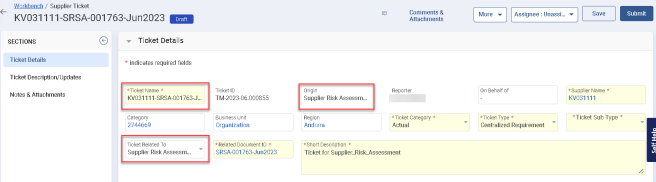
2.0.1.7 Ticket Creation – Flip from Other Documents using – (Supplier Risk Assessment Form)
If there is a high risk in Supplier Assessment, then you can create a Ticket to take proper measurements and resolve the risks.
-
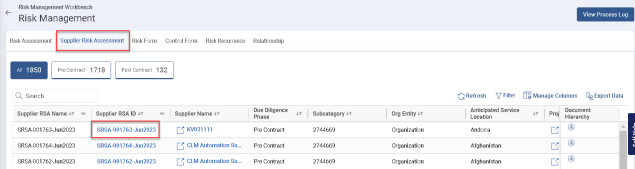
To create a ticket using Flip from the Supplier Risk Assessment Form. Open the Supplier Risk Assessment Form and click any ID to open the form as shown in the below figure.
-
Open the Risk Assessment Form and navigate to the Ticket section and click Create Ticket icon.

-
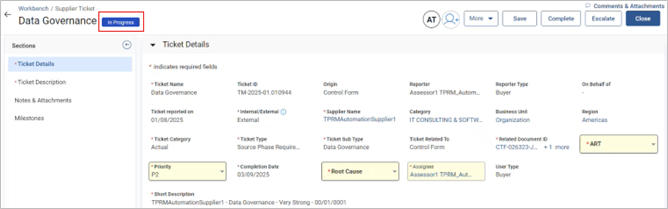
You will be redirected to the Supplier Ticket Management Workbench, where a new ticket is created with some of the fields auto-filled.
|
Note |
The Ticket Name will be the Supplier Risk Assessment ID as you flipped the ticket from Risk. The Origin will be Supplier Risk Assessment as the source of the ticket is considered from the Risk. |
-
a) You can notice that some of the fields are auto-filled as the ticket is flipped from Risk Assessment as shown in the below figure.
|
Note |
To complete the ticket submission, follow the same steps as explained in the above section 2.1.1.4 |
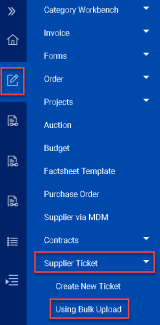
2.0.1.8 Ticket Creation – Using Bulk Upload
The buyer can create a new supplier ticket using the following option:
-
Click Create icon on the left panel à Supplier Ticket à Using Bulk Upload
-
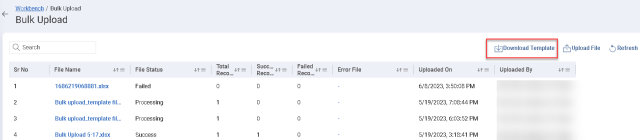
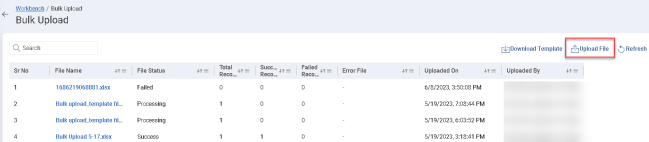
Once you click Bulk Upload, the following page appears. Click the Download Template icon as shown in the below figure.
-
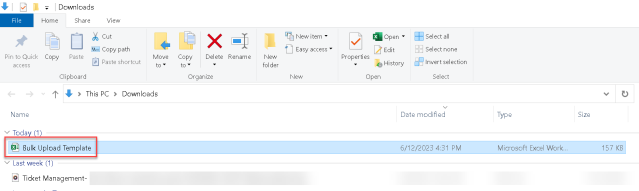
The template will be downloaded, open the downloaded template from your downloads folder.
-
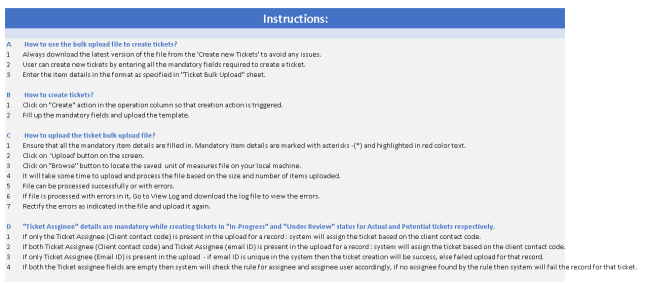
In the template, you will view multiple sheets, you can also view the Instructions Sheet which provides detailed instructions to be followed while filling in the details in the downloaded template.

-
Click the Basic Details sheet where you can view the field names in columns that are available in the application.
-
Enter or select all the field information in the template columns. There are predefined codes to be selected in the template sheet for some of the columns.

-
Once you fill in all the columns in the template, save it and upload the template by clicking the Upload FileIcon.
-
Select the template and click the Open and Done buttons.

-
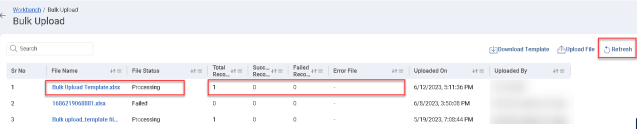
You can view the file upload status which displays the Total Records, Success Records, Failed Records, Error Files, Uploaded On, and Uploaded By information as shown in the above figure.
-
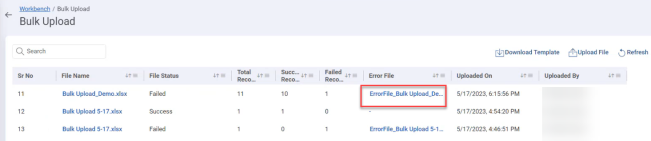
If the upload template status is failed, it displays the columns that are missing information under the Error Files field.
|
Note |
You can create a ticket using the Bulk Upload Template option only in Draft, InProgress, and Under Review status |
|
Note |
You can only create a new ticket and multiple tickets in a single template using the Bulk Upload Template option. |
2.0.1.9 Creation of Terminal Status for Ticket Rejection
A new configuration is introduced to set the ticket status to Rejected with the option for you to either reopen or close the ticket if necessary.
Setting Name: Set Rejected Status on Ticket Rejection Flow
2.0.1.10 Team Member Section in Ticket Document
The Team Member section is created in Ticket Management/Action Plan document. Using this, additional Buyers can be added in the Team Member section to define more stakeholders for the action plan document and to improve document management. The roles, are additionally exposed in the Escalation/SLA Matrix so that relevant roles can be configured for management.
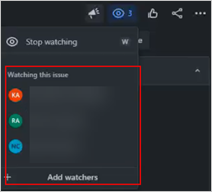
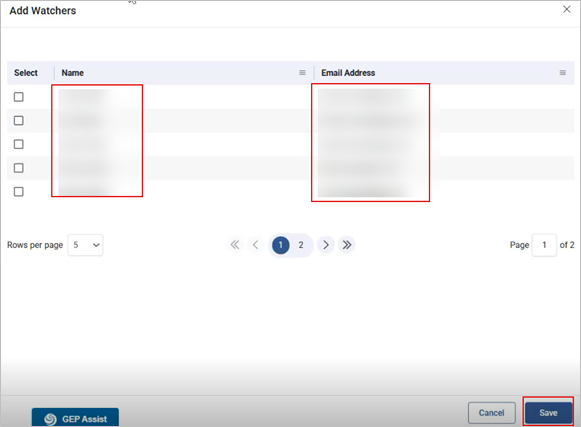
Action Plan Creator – Configurable Watcher Functionality (Auto-Addition)
The Action Plan creator is automatically added as a watcher in the Action Plan document by default. This behaviour needs to be configuration-driven, allowing the default addition of the Action Plan creator to the watcher list to be controlled per domain.
2.0.1.11 Approval Integration for Ticket Document
The ticket/action plan document can be sent for approval. On completing a ticket, if the setup has been enabled on the domain, then the ticket will move to Approval Pending, with approvals triggered and configured approval can have an option to Approve, Reject or Send Back
2.0.2 Escalating Ticket
You can escalate the ticket to any of the higher-level positions to take action against the ticket to complete/close if the ticket is in In-Progress or Reopened-In Progress status.
|
Note |
You can escalate the ticket based on the following scenarios. If the:
|
Follow the below steps to Escalate the current ticket.
-
Open the ticket which is in In Progress or Reopened-In Progress status.
-
Click More à Escalate

-
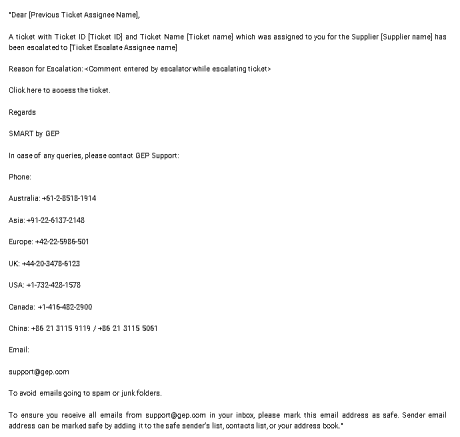
A slider appears, select the assignee from the list and click the Done button. A confirmation pop-up appears, enter the reason/comments for escalating the current ticket and click the Yes button. A success message appears.mi
|
Note |
Once the ticket is escalated and the current assignee is changed to new assignee, the previous assignee will no longer be able to access the ticket. |
2.0.3 Re-assigning the Ticket
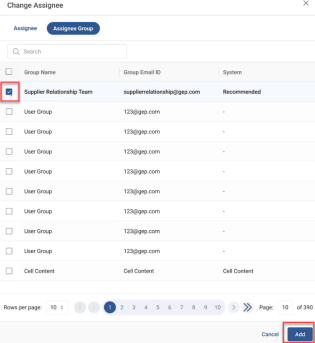
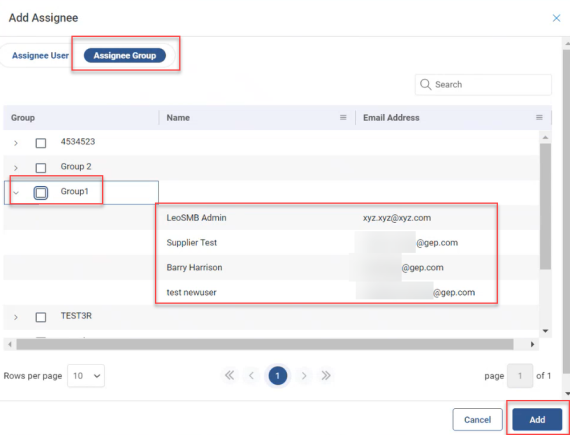
You can reassign the ticket to another person by clicking Assignee button. A slider will appear to select the assignee and click the Done button.

-
Select Group User as Ticket Assignee and any user from the group can act on the assigned ticket.
2.0.4 Email Notifications for Ticket, Milestones, and Activity Assignments
The assignee will receive email notifications if the Ticket, Milestones, and Activities are assigned. You can view the triggered email notifications as shown in the below figures:
-
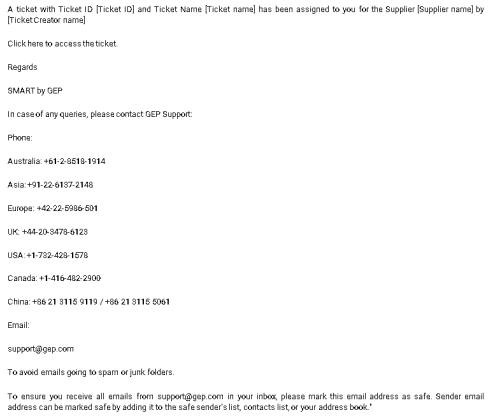
Email Notification against Ticket Assignment: Whenever a new ticker is created and assigned to any of the users an email notification is triggered to the selected assignee as shown in the below format.
-
Email Notification against Milestone Assignment: Whenever a new milestone is created and assigned to any of the users an email notification is triggered to the selected assignee once the invitation is sent as shown in the below format.
-
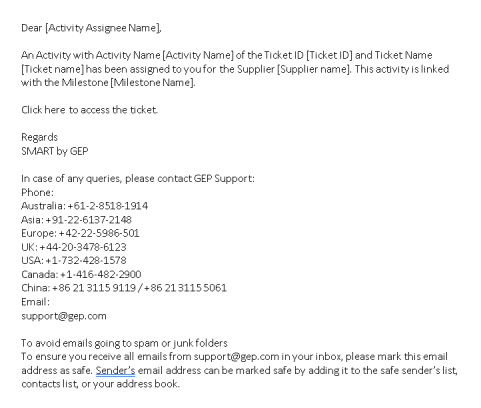
Email Notification against Activities Assignment: Whenever a new activity is created and assigned to any of the users an email notification is triggered to the selected assignee as shown in the below format.
|
Note |
You can refer the Excel to view the email notifications, which are triggered on various ticket task assignments.
|

-
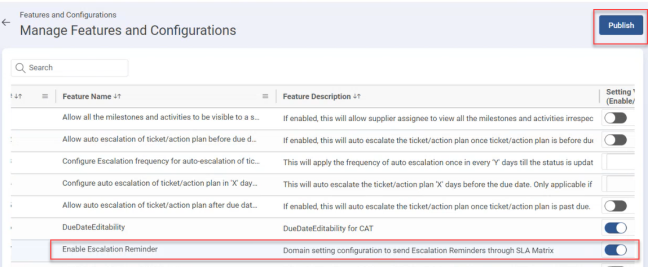
A new domain setting allows you to select whether only notification is to be sent to an escalated assignee or the ticket/action plan assignee also to be updated to an escalated assignee along with the notification. The notification feature upon escalation also sends a consolidated list of all escalated document IDs eg: multiple escalated ticket IDs will be mentioned in the Excel attachment of the email notification.
2.0.5 Reassignment of Milestones / Activities
You can reassign the milestones to another user only if the current milestone/activity is in Assigned status. Follow the below steps to reassign the milestones.
-
Open the current milestone/activity which you want to reassign to another user.
-
A slider will appear, click the Edit button where you can view the fields that are editable. To change the assignee, select from the list and enter your comments in the field and click the Save button. A success message appears.
-
You can follow the same process for Activity re-assignment.
-
Introducing 'Save and Invite' Button: Currently, you need to assign the Milestone/Activity by clicking on the Invite button separately now, you can send an invite from the Milestone and Activity slider by clicking on the Save and Invite button. Now there would be three buttons on the Milestone/Activity slider:
-
Cancel (Secondary)
-
Save (Secondary)
-
Save & Invite (Primary)
2.0.6 Approval Process for Milestones and Activities
Follow the below process to approve milestones and activities.
-
Open the milestone which is in Achieved status. A slider will appear, click the Edit button to make the milestone fields editable. Make the required modifications and Click the Save button.

-
Reopen the milestone where you can notice the status changes to Achieved Pending Approval.
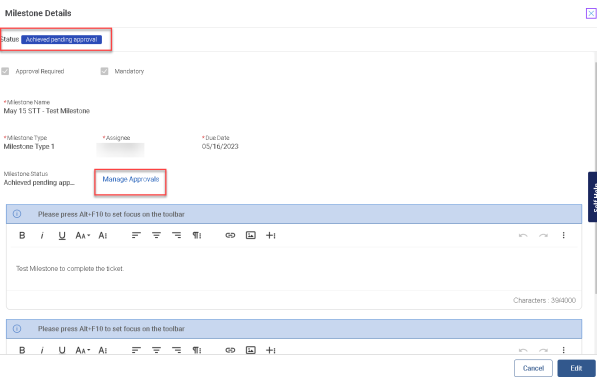
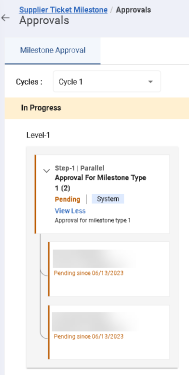
Click Manage Approvals, and you will be redirected to the Approvals page where you can view the name of the approver with whom it is pending since what date. The approval steps and approvers can be defined in approval rule engine and if not defined in approval rule engine then it can be manually added by the milestone/activity assignee
-
Once all the approval cycles are approved by respective approvers the status of the milestone/activity changes to Achieved.
-
You can select Group User as Ticket Assignee and any user from the group can take action on the assigned ticket.
2.0.6.1 Capability to Add Milestone Assignee as Approver for Activity Approval
The milestone assignee can be added for Approval, in its relevant activity approval. So that on completing an activity, if approvals are required for that activity, as part of setup this approval can be sent to its Milestone assignee.
2.0.7 Auto-Population of Milestone and Activity Based on Rule Engine
With few standard fields, the milestone/activity can be auto-populated based on the rule engine once the ticket is submitted. To view/create a new rule engine follow the below process.
-
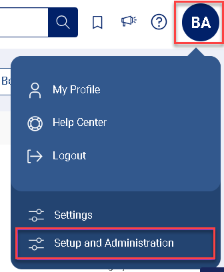
Click the user profile icon and Setup and Administration
-
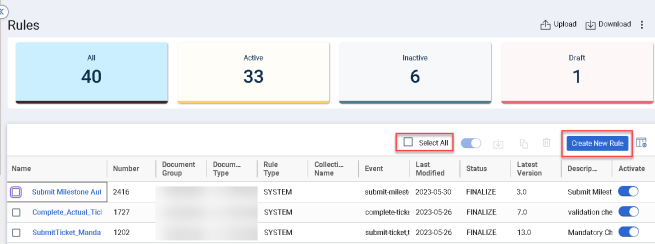
Navigate to Setup àRules Setup àSupplier Ticket Management the following page appears where you can create new rule / view current rules.

-
To Activate/Deactivate the selected rule, click the
 toggle icon.
 -
To download the Rule Logs, click the
 icon.
icon. -
To copy the rule, click the
 icon.
icon. -
To delete the rule, click the
 icon.
icon. -
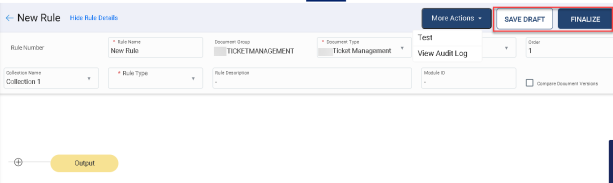
To create a new rule, click the Create New Rule button, the following page appears, enter all the mandatory information in the fields, and click the Save Draft or Finalize buttons.
-
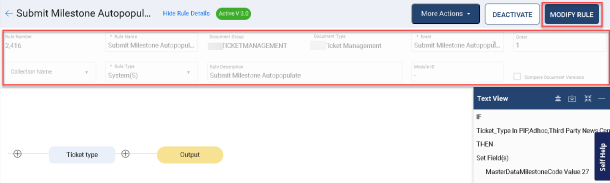
To view existing rule details, select and click any of the rule names. The rule page will open as shown in the below figure.
-
To modify the existing rule click Modify Rule button, rule page will be in edit mode, make changes as required and click the Save Draft or Finalize buttons.
-
Click the Menu icon
 to view the drop-down options.
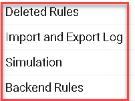
-
a) Deleted Rules: You can view the list of deleted rules.
-
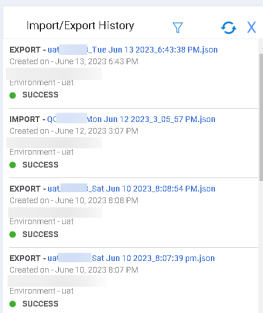
b) Import and Export Log: You can view the log details of the selected rule.
-
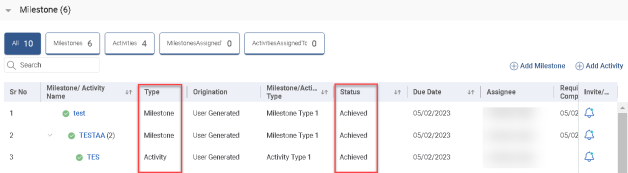
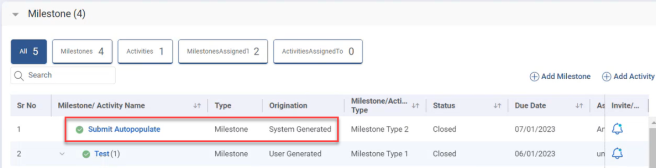
Once the rule is set up and the ticket is submitted, the Milestone and Activity will auto-populate, and the Origination will be shown as System Generated as shown in the below figure.

2.0.8 Notification Template Updates
The Ticket Notification templates are updated to include more stakeholders as Receivers.
The email notification will be sent to Ticket Creator, Ticket Assignee, Milestone Assignee, and Activity Assignee if the ticket is closed/completed.
Once the Milestone is achieved, the email notification will be sent to Ticket Creator, Ticket Assignee, and Milestone Assignee.
Once the Activity is achieved, the email notification will be sent to Ticket Creator, Ticket Assignee, Milestone Assignee, and Activity Assignee.
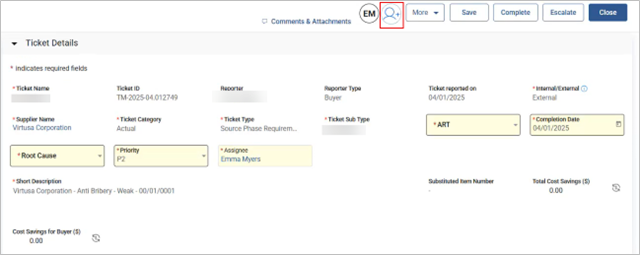
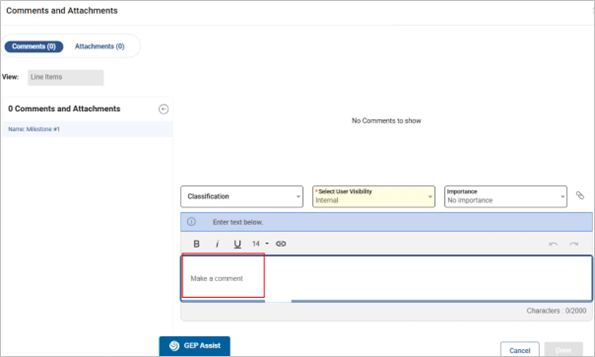
2.0.9 Comments and Attachments
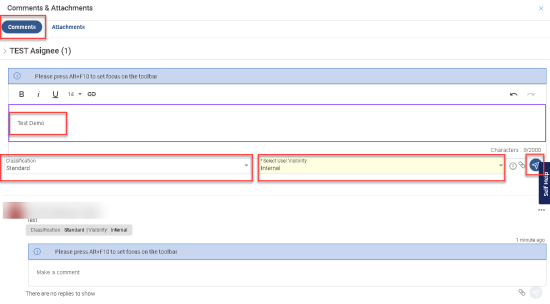
You can add comments and attachments to the ticket which helps the assignee to understand easily to close the ticket by referring to the comments and related attached documents. The comments task is like a discussion forum where you can communicate with the internal or external users.

To Add Comments and attachments, click the Comments & Attachments link as shown in the above figure.
-
How to add comments:
-
a) Click the Comments tab, enter your comments in the field and select Classification and User Visibility from the drop-down and click the post
 icon as shown in the below figure.
-
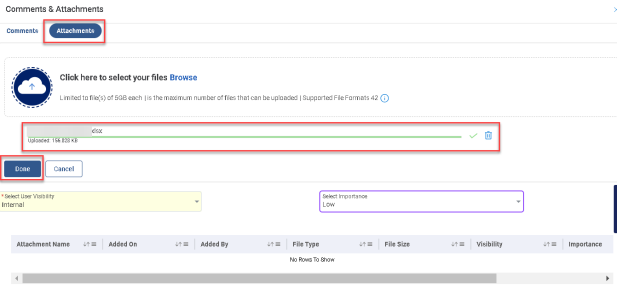
How to add attachments:
-
a) Click the Attachments tab, select the required file to upload and select User Visibility and Importance from the drop-down and click the Done button.
-
b) The uploaded attachment details will appear as shown in below figure.

-
c) The comments related to Escalate, Close, or Completed actions are now integrated with the Comments & Attachments at the header level.
2.0.10 Viewing Approval and Rejection Comments on Slider UI
The Approval and Rejection comment fields are not visible on the Activity or Milestone when opening the slider, until the Track Status page is opened. This often leaves Milestone and Activity assignees unaware of the required changes to resubmit the milestone or activity.
To address this, the Approval and Rejection comment fields (text-area) will now be displayed when the following conditions are met:
-
Milestone or Activity Status = In-Progress
-
Approval Status = Reject or Sent Back
Only the most recent Approval or Rejection comment will be visible, rather than the entire list of comments added during the approval flow.
2.0.11 Integrating Risk Intelligence API
IIn TPRM, there is a capability to pull risk information from the external platform into the GEP platform to perform a risk assessment for a given entity. While reviewing this data, the Risk Reviewer may need to raise the findings to mitigate the risk, where you can use the Supplier Ticket Management feature. Risk Reviewer must use the Create Ticket button to open the Ticket document in a Draft state with pre-filled fields. In this document, two fields, Ticket Type and Ticket Sub-Type, must have relevant data if it is created from the TPRM for Risk Intelligence data. Risk Intelligence documents from the TPRM can be linked with this ticket.
Note: The Ticket Origin and Ticket Related To fields are set to Risk Intelligence.
Ticket Management is integrated with the GEN AI feature, which generates responses in a report form for queries related to the Supplier Ticket Management module.